Effective immediately, please send all equipment to our new facility in Oakdale listed below. Any equipment sent to our old address will be at risk of loss or major delays!
The Energy Conservatory
403 Hayward Ave N
Oakdale, MN 55128
Calibration and repairs are performed at our facility in Oakdale. Please fill out the Equipment Service Form
Frequency of calibration
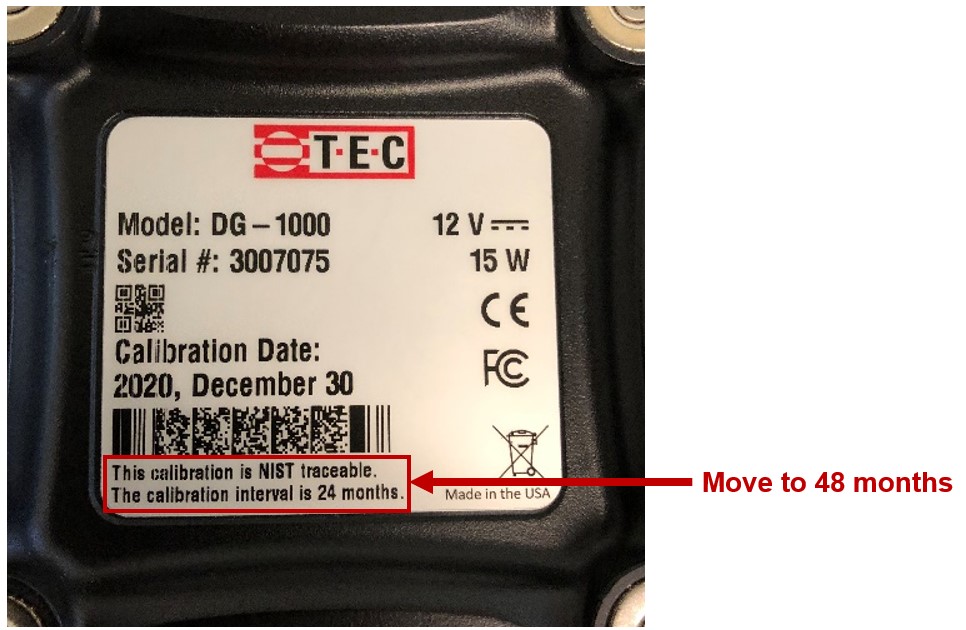
DG-1000, DG-8 and Digital TrueFlow® Calibration Interval is now 4 years (48 months)
This change is RETROACTIVE – meaning it is valid for all DG-1000 and DG-8’s. More details on this change.
Read the calibration date on the back of your DG-1000 and add 4 years (48 months) to determine the next calibration date. For example, the gauge shown below was calibrated on Dec 30, 2020. Therefore, the next calibration is due on Dec 30, 2024.
DG-700 and DG-500 Calibration Interval remains 2 years (24 months)
DG-700’s and DG-500’s should be recalibrated every two years to maintain the instruments accuracy specifications of 1% of reading, or 0.15 Pa, whichever is greater.
DG-2’s and DG’3 should be recalibrated every year.
Details of returning your gauge for calibration or repair
- Calibration is performed at our facility in Minneapolis, MN (see address below). We do not calibrate gauges at conferences or trade shows.
- Please complete the Equipment Service Form (fill-out by hand or fill-out in your browser, If you are trying to fill out the PDF online using FireFox, click here.). Please include the Equipment service form with the equipment being sent.
- Cost for calibration of a TEC digital pressure gauge is $150 (DG-2, DG-3, DG-500, DG-700, DG-1000). This price includes return ground shipping within the continental 48 states (expedited or air shipments will cost more).
- Customers in Canada – Non-warranty repairs are dutiable and GST applies to the value of the repair only. The invoice must include the original value of goods and the repair amount. Brokerage fees apply to shipments sent UPS Standard to Canada.
- Turn around time at our facility for calibration is typically 2-3 days following receipt of the instrument (assuming no repairs are necessary). We will provide an NIST traceable calibration certificate which includes “as found” as well as “current condition” pressure data.
- Note: Calibration of a TEC APT device is $180.
Looking to Upgrade your Gauge?
Download the DG-1000 Upgrade Form for more information.
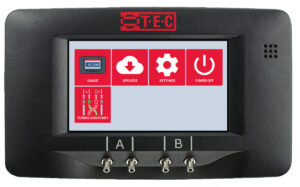
Checking Gauges in the Field
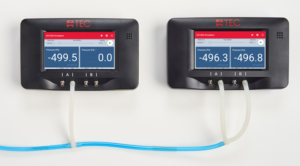
In lieu of sending your DG-1000, DG-700 or DG-500 gauge into TEC for calibration, customers may choose to perform a field calibration check procedure which is contained in the Digital Gauge Field Check document. This document describes a procedure to field check the calibration of digital gauges against a recently calibrated digital gauge that is being used as an in-house reference standard.
We have also created a simple Excel-based tool which supports the Field Check Process and Summary of Results.
Download FIELD CHECK EXCEL TOOL here.
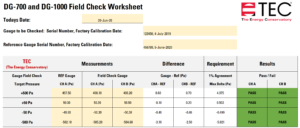
We recommend that a field calibration check be performed annually, or whenever a gauge has been dropped or damage is suspected. Results of field calibration checks should be recorded and documented by the customer using the sample log sheets provided at the end of the calibration check document. Gauges that fail the Digital Gauge Field Calibration Check will need to be sent to TEC for recalibration.
Comparing channels on the same gauge
It is also a good idea to periodically check the two channels of the DG-1000, DG-700 and DG-500 pressure gauge against each other to be sure they are reading very close to same value (e.g. they should always be within 1% of each other). This test will quickly isolate gauges with large problems (e.g. damaged flow sensors), and is described in the Comparing Channels on the Same Gauge document. This procedure does not replace the need for gauge recalibration once every two years.
Calibration of Blower Door and DuctBlaster® Fans
TEC Minneapolis Blower Door™ and DuctBlaster® fans maintain their calibration unless physical damage occurs to the fan or flow sensing system. Conditions which can degrade calibration of the fan are easily detected and should be field tested by the customer on a regular basis using the procedures contained in the Fan Field Check documents. Blower Door and DuctBlaster® fans can be custom calibrated at the TEC facility for a fee. Custom fan calibration parameters can be easily entered into our TECTITE™ and TECBLAST™ software. Note: Custom fan calibration is not necessary for most testing applications.
Minneapolis Blower Door™ Fan Field Check Document
This document describes a procedure to check a Minneapolis Blower Door™ for damaged flow sensors, leaks in the flow sensor or tubing running from the flow sensor to the fan pressure tap, or improper positioning of the flow sensor relative to the fan housing. We recommend that a field check of the fan be performed at least annually, or whenever a fan has been dropped or damage is suspected. Results of field checks should be recorded and documented using the Blower Door Fan Field Check Form.
Minneapolis DuctBlaster® Fan Field Check Document
This document describes a procedure to check a Minneapolis DuctBlaster® for damaged flow sensors, leaks in the flow sensor or tubing running from the flow sensor to the fan pressure tap, or improper positioning of the flow sensor relative to the fan housing. We recommend that a field check of the fan be performed at least annually, or whenever a fan has been dropped or damage is suspected. Results of field checks should be recorded and documented using the DuctBlaster® Fan Field Check Form.
Field Calibration Plate for DuctBlaster® System Document
The DuctBlaster® Field Calibration Plate allows you to quickly check the calibration of the entire DuctBlaster® System with DG-1000 or DG-700 gauge. The calibration plate is mounted on the square transition piece on the end of the flex duct. The DuctBlaster® fan is turned on to pull air through the calibration plate and simulate a duct leakage test. Results from the simulated test are compared to the known leakage rate to determine if the entire system is within a +/- 3% accuracy range. This calibration check covers the entire system, including the DuctBlaster® fan, the DG-1000 or DG-700 gauge, and the flex duct. A DuctBlaster® Field Calibration Plate can be purchased from us. Instructions for using the Calibration Plate are contained in the DuctBlaster® Field Calibration Plate document.
Calibration of APT Data Acquisition Boxes
TEC recommends that APT Data Acquisition Boxes be recalibrated once per year at our facility in Minneapolis, MN (see address below). The cost to calibrate an APT Data Acquisition Box is $180. This price includes return ground shipping within the continental 48 states and Canada (expedited or air shipments will cost more). Turn around time at our facility for calibration is typically 3-4 days following receipt of the instrument (assuming no repairs are necessary).When returning an APT Data Acquisition Box for calibration, please use the Equipment Service Form, fill it out completely, and include a copy of the completed form along with the equipment being returned.
Returning Equipment
Equipment Return Shipping Instructions
Complete TEC’s Equipment Service Form and include it with the equipment you are returning for calibration or repair.
In order to prevent shipping damage, TEC recommends the following:
Gauges, APTS and Fan Speed Controllers:
These items should be shipped in a box with good packing and NOT shipped in an envelope. Padded envelopes do not provide enough protection. Items should be
wrapped separately before placed in the box (wrapped in bubble wrap, packing paper, etc.).
Fans
Fans should be returned in the original box with the original padding spacers if possible. When using a different box, make sure it is heavy duty and that the fan is well padded and tightly packed.
Please do NOT pack your items in packing peanuts or shredded paper. If you must use either of these materials, please place your equipment in a plastic bag to prevent peanut/paper infiltration.
TEC Address
-
The Energy Conservatory
403 Hayward Ave N
Oakdale, MN 55128 - (612) 827-1117 phone
(612) 827-1051 fax - info@energyconservatory.com
Attn: Equipment Repair/Calibration
When sending equipment for calibration or repairs, please use the Equipment Service Form, fill it out completely, and include a copy of the completed form along with the equipment being returned.
Equipment Repairs
If you ever have an equipment problem, we always stock a complete line of replacement parts, and can respond quickly to any service problem. All equipment needing repairs (or calibration) should be sent to our facility.
Minneapolis Blower Door™ Door Frame Field Repairs
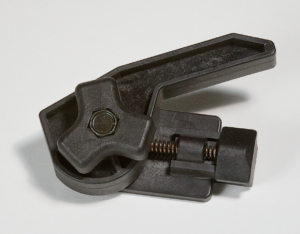
After several years of use, sometimes the Blower Door Frame Cam Levers Need Replacement. Download the CAM LEVER REPLACEMENT PROCEDURE here.
DG-700/500 Reset Procedure
On occasion, when a new set of batteries are installed in a DG-700 or DG-500 Pressure Gauge, the Gauge will appear as if it has locked up. This is characterized by looking at the display after it has been turned on and all of the icons and digits stay on the display and the buttons do not work. Another condition that requires a reset is when the Gauge turns on, shows the battery voltage, then shows Pr/Pr and immediately turns off. The reset process is extremely simple –
- Turn the Gauge off
- Open up the battery compartment door on the back of the Gauge
- Remove all batteries
- Press and hold the ON button for a slow count of 20
- Reinstall batteries and install battery cover
- Turn on Gauge
You may have to repeat the process one more time. If the Gauge does not return to normal operation it may need servicing that can only be performed at TEC. Complete the Equipment Service Form and send it along with the Gauge.

