
New Tubing Assistant Takes the Guesswork out of Tubing Setup
Correct tubing connections are vital to proper air tightness and duct leakage tests, but setup errors are some of the most common mistakes in the field.
Hooking up tubing isn’t always as simple as color matching a tube to a tap. Any number of variables, from the type of test to gauge location and test direction, can influence the best way to set up tubing.
To help solve these issues, TEC developed its Tubing Assistant tool. With an easy-to-use display, the Tubing Assistant will walk you through proper tubing setup in a few clicks. It’s a reliable way to ensure correct tubing hookups in any testing situation, every time.
How to use the Tubing Assistant
The Tubing Assistant can be accessed via The Energy Conservatory website and works with mobile devices for use in the field.
The tool takes five critical factors into account: test type, test direction, gauge location, test device and which TEC gauge is being used. With almost 100 possible connection options, the Tubing Assistant offers support when you are confronted with a new situation and color coding alone can’t help.
It starts with the test type: Building tightness, duct tightness or other. Tubing configurations are different for building tightness and duct tightness tests because the volume and pressure needed for readings differ. Scenarios that fall into the “other” category include tubing configurations for the Exhaust Fan Flow Meter, the TrueFlow® Air Handler Flow Meter and the Micro Leakage Meter.

Test direction is another key factor. Pressurization tests of a house requires an additional pressure tube compared to depressurization, and a depressurization test of ductwork requires an additional tube connection. Without that tube, test readings can be inaccurate. By using the Tubing Assistant, the hookup of the extra tube is clearly marked, as seen below. In this situation, all inputs except test direction are the same.
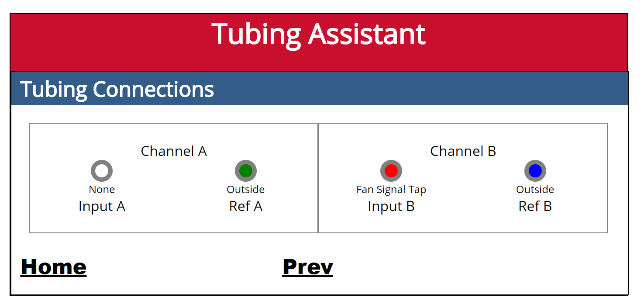
Building Pressurization
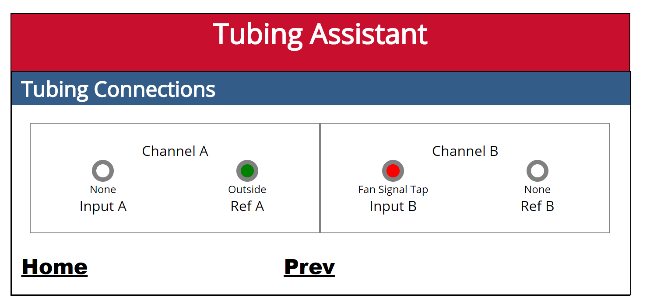
Building Depressurization
Gauge location is the next factor the Tubing Assistant reviews. Gauge placement inside or outside the building requires more understanding of the reference pressures, and the proper tubing connection can make or break your test.
The test device is an important part of the setup. A Model 3 Blower Door fan, Model 4 Blower Door fan and Duct Blaster® fan all feature different flow rates. The images in the Tubing Assistant guide you through selecting the proper device.
The final step of the Tubing Assistant is the gauge being used – the DG-1000 Pressure and Flow Gauge or DG-700 Pressure and Flow Gauge. The orientation of tube connections for channel A and B will change based on the gauge. The DG-1000 shows horizontal setups, while the DG-700 features vertical, as seen below.
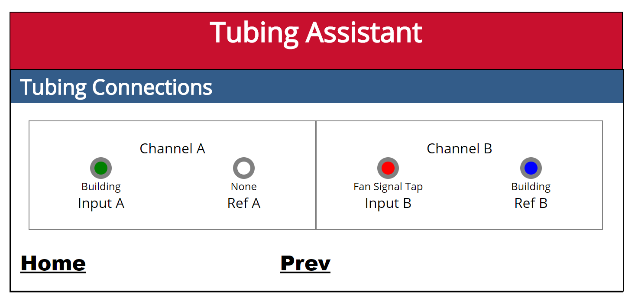
DG-1000 Tubing Setup
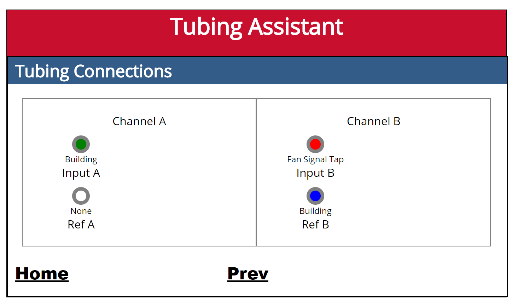
DG-700 Tubing Setup
For any configuration, the Tubing Assistant can help!
Correct tubing configuration leads to more accurate readings. With its straightforward design and hands-on approach, the Tubing Assistant will help you determine the best tubing setup for your application.
Click here to use the Tubing Assistant.